MCP connects your AI assistant (Claude, Codex, or Grok) directly to AI Sync.
After a one-time setup, you can work with your AI Sync project by giving normal instructions to your agent — create agents, manage numbers, check calls, and more — without opening or login to your project.
There are two AI Sync connections. This page sets up the one that reads and changes your account, which needs your login.
There is also a read-only connection to these documentation pages that needs no account at all — useful for new reps and contractors. See Connect your agent to these docs. Most teams run both.
🎯 Why use MCP?#
Without MCP, you open the AI Sync Dashboard and click through screens to do work.
With MCP, you stay in your AI client and type what you need. Your agent talks to AI Sync for you.
| Without MCP | With MCP |
|---|---|
| Open the Dashboard | Stay in Claude, Codex, or Grok |
| Click through menus and forms | Give a plain-language command |
| Switch between tools | Keep working in one place |
Examples of what you can ask after connecting:
- “List my AI agents”
- “Create a new outbound agent for lead follow-up”
- “Show recent call history”
- “Which phone numbers are available?”
You describe the task. Your agent uses AI Sync through MCP.
🧭 One-time setup#
Do this once per client. After that, you only give commands.
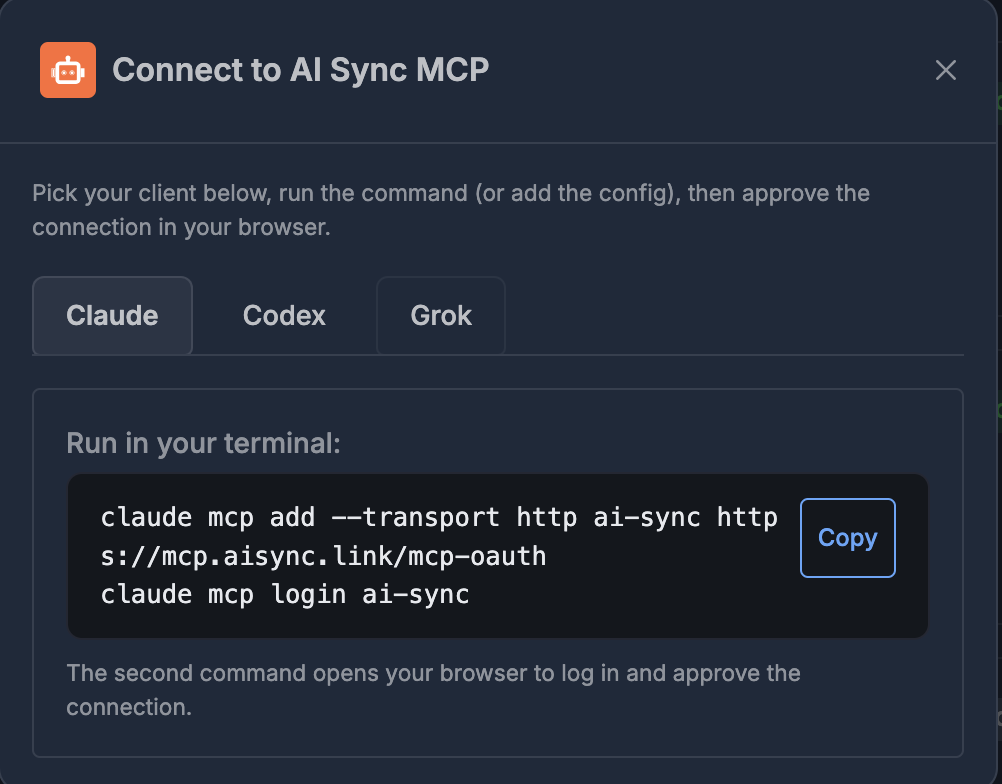
- Open MCP (Connect to AI Sync MCP).
- Pick your client: Claude, Codex, or Grok.
- Click Copy and run the command in your terminal.
- Approve access in your browser when asked.
Setup is only for connecting the client. Day-to-day use is just talking to your agent.
🟣 Claude#
- Select the Claude tab.
- Run these commands:
claude mcp add --transport http ai-sync https://mcp.aisync.link/mcp-oauth
claude mcp login ai-sync- The second command opens your browser — log in and approve the connection.
🟦 Codex#
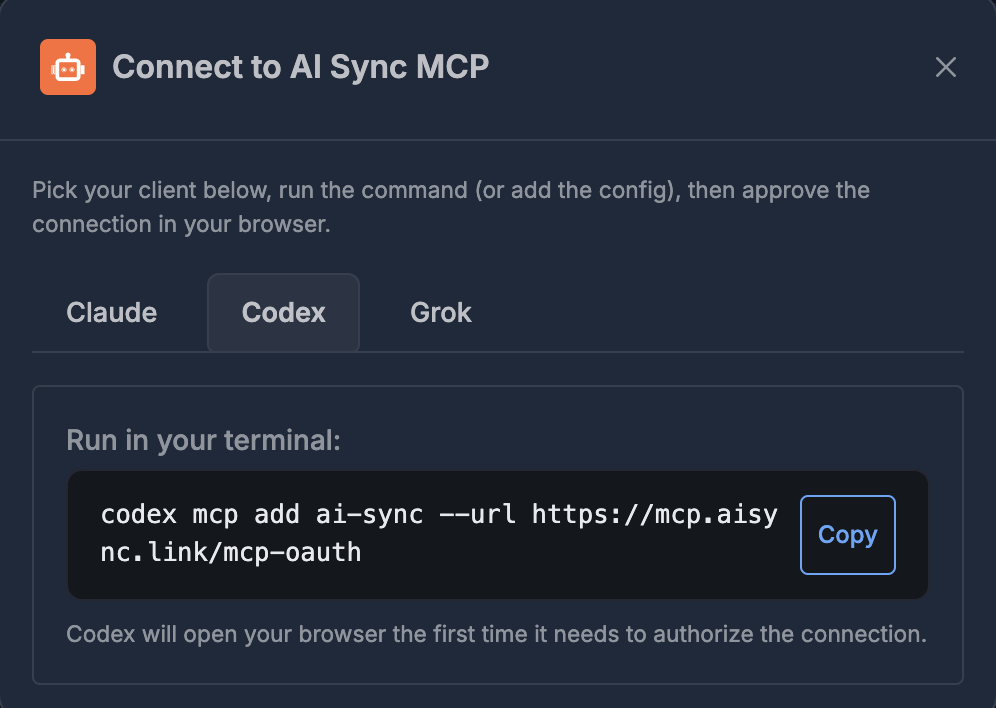
- Select the Codex tab.
- Run this command:
codex mcp add ai-sync --url https://mcp.aisync.link/mcp-oauth- Codex opens your browser so you can sign in and approve. If it doesn't, run
codex mcp login ai-sync.
Codex runs on your own ChatGPT plan, so building agents, prompts and
workflows this way costs nothing extra. Keep Codex up to date
(npm install -g @openai/codex@latest). See
Use your ChatGPT plan with AI Sync.
🟨 Grok#
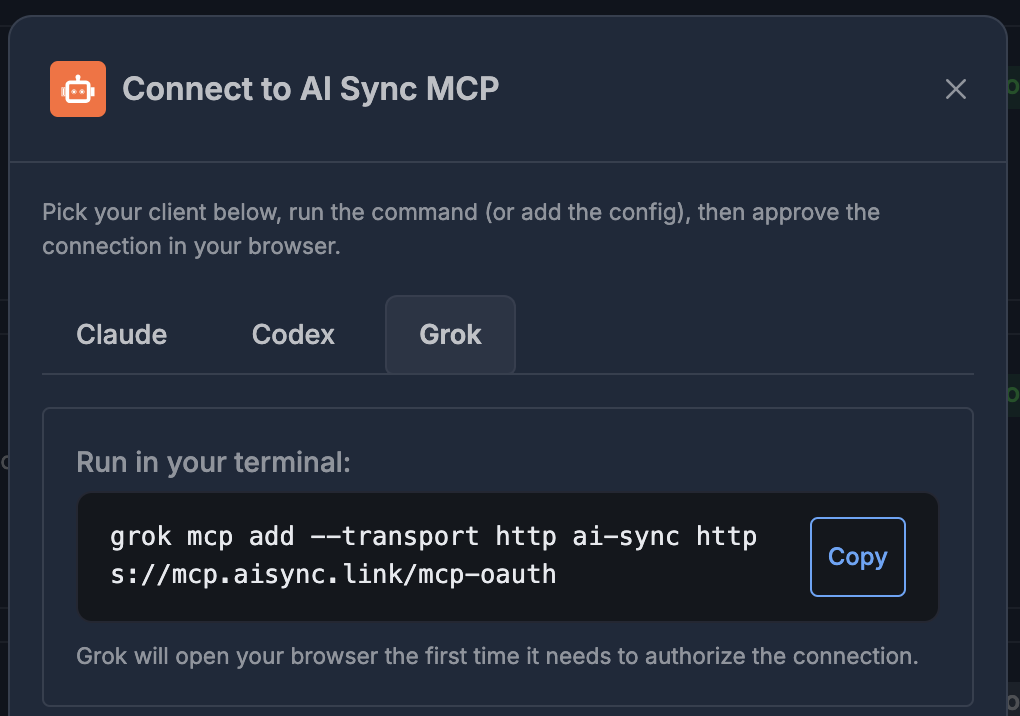
- Select the Grok tab.
- Run this command:
grok mcp add --transport http ai-sync https://mcp.aisync.link/mcp-oauth- Grok opens your browser the first time it needs to authorize.
✅ How to use it every day#
After setup:
- Open Claude, Codex, or Grok as usual.
- Ask for what you need in plain language.
- Your agent uses AI Sync MCP in the background.
- You do not need to open the Dashboard for those tasks.
You only return to MCP if you need to reconnect, switch clients, or set up a new machine.
🛠️ If something goes wrong#
| Problem | What to try |
|---|---|
| Command not found | Install the Claude, Codex, or Grok CLI first |
| Browser does not open | Re-run the connect/login command for your client |
| Agent cannot reach AI Sync | Open MCP, copy the command again, and reconnect |
| Wrong client | Use the matching tab before copying the command |